Anviz Clocking Devices
Mount, connect to the network, and register employee cards on an Anviz clocking device.
Anviz devices are physical clocking terminals that let employees clock in and out by presenting a contactless card or tag. This guide covers mounting the device, connecting it to the network, and registering employee cards.
Integration must be activated first
If you own an Anviz device, or MyChronos has provided you with one, the Anviz integration must be activated on your account before it can be used. Contact MyChronos support to have it activated.
Mounting the device
The box includes a metal wall plate along with the screws and wall anchors needed to mount it.
Fix the wall plate to the wall
Use the included wall anchors and screws to secure the metal plate to the wall in the position where you want to install the device.
Clip the device onto the plate
Once the plate is installed, fit the device onto it until it clicks into place.
Connecting to the network
We recommend connecting the device to the internet with an Ethernet cable. If that's not available, you can also connect it over Wi-Fi.
Recommendation
Use a wired Ethernet connection whenever possible. It's more stable and reliable than Wi-Fi.
Connecting over Wi-Fi
To connect the device over Wi-Fi, you'll need the installer password, which MyChronos support can provide.
Open the settings screen
Press 0, then press OK. Enter the PIN provided by MyChronos support.
Go to the Network option
In the configuration menu, use the ⬅ IN and OUT ⮕ buttons to navigate to the Network option, then press OK to confirm.
Open the Wi-Fi menu
Inside the Network menu, go to Wi-Fi.
Select your network
Choose the Wi-Fi network you want to connect the device to and enter its password.
Registering employee cards
Once the device is connected to the internet, associate each contactless card or tag with the corresponding employee so they can identify themselves to clock in and out.
Open the Employees section
Go to /panel/employees in the MyChronos admin panel.
Open Associate card
On the row of the employee you want to assign a card to, click the three-dot menu and select Associate card.
Enter the card number
Enter the number printed on the card or tag and confirm.
Wait for the sync
Wait a few seconds — the card syncs automatically with the clocking device.
Clocking in and out
Once an employee's card is associated, they can clock in and out simply by tapping it on the device.
Check the device's current status
Look at the bottom-left of the screen: when the device is ready to clock an entry or an exit, it shows the ENT/SOR indicator.
Tap the card
When the card is tapped, MyChronos automatically records a clock-in or a clock-out as needed: if the employee already has an open entry, it's closed (clock-out); if they don't have one, it's opened (clock-in). Nothing needs to be changed manually for this everyday use.
Recording a break
A break counts as worked time
Recording a break does not stop the normal clock-in counter. A break is rest time the employee is entitled to after a certain number of hours worked, so it counts as worked time. If you want that time to not count as worked, don't use Break: clock out, and when it's over, clock back in — without recording a break in between.
Switch the status to Break
Use the ⬅ IN and OUT ⮕ buttons to cycle through statuses until the bottom-left of the screen shows Break.
Tap the card
With the status set to Break, tap the card to start the break. Tap it again, with the status still on Break, to end it.
An open clock-in is required
If the employee doesn't have an open clock-in, tapping the card while the device is on Break status will open a regular clock-in instead of a break — a break can't be started without a workday already in progress.
Distinguishing break types
By default, the Break status records a generic break. If you want to distinguish between types (for example, breakfast, lunch, or a smoking break), create them under Settings → Break types.
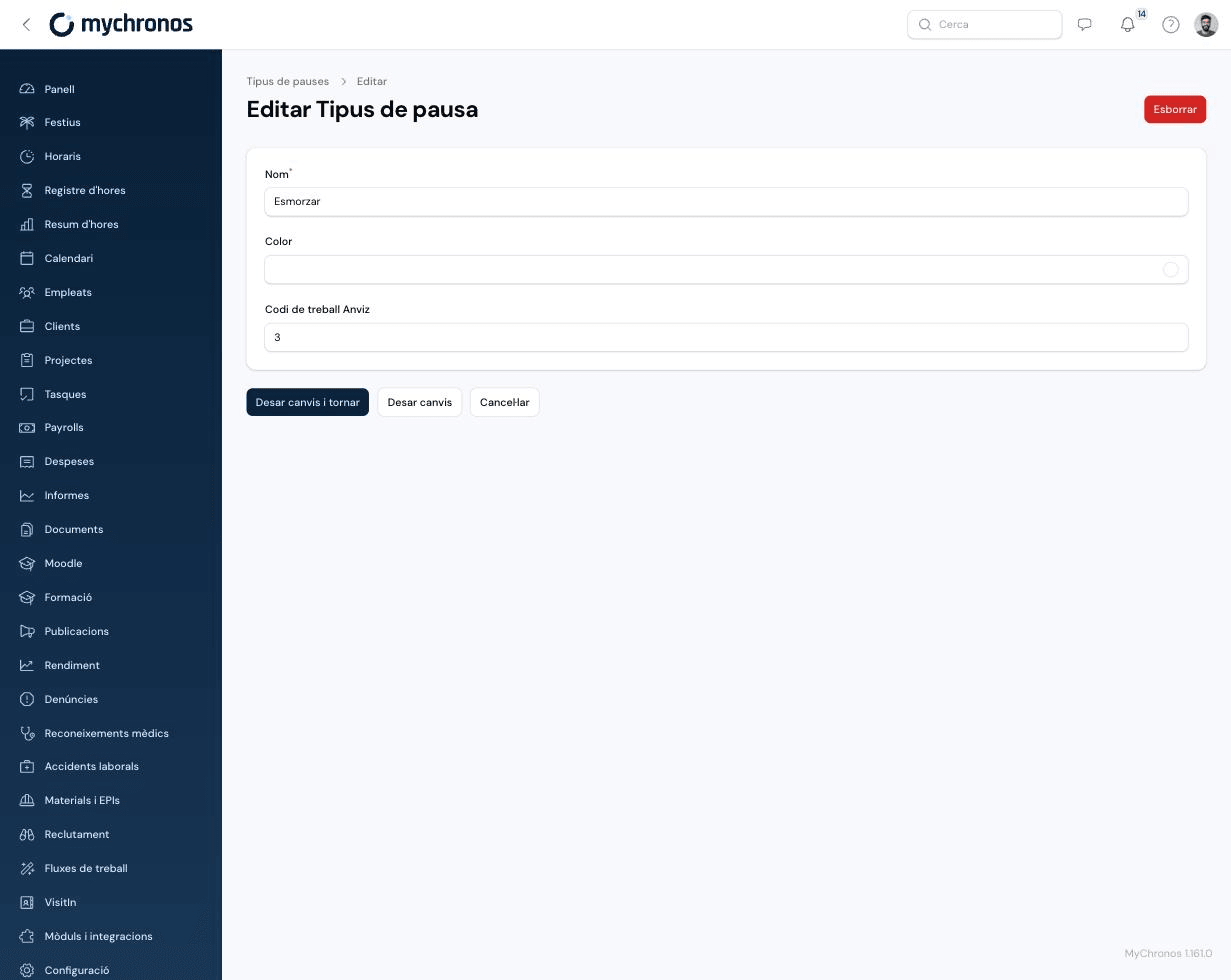
Each break type has an Anviz work code field (only visible if the Anviz integration is enabled) that determines the position it appears in when cycling through statuses with the left/right arrows. You can use numbers from 1 to 16.
If you need more than 16 types, or want to jump straight to a code without cycling through with the arrows, press FN, the code number, and OK, then tap the card. Check the bottom-left of the screen to confirm the device shows the correct break type before clocking.