Workplaces
Define your company's physical locations and optionally restrict where employees can clock in using GPS zones.
Workplaces represent the physical locations where your employees work — an office, a job site, a client's premises, and so on. They're used throughout MyChronos to organize employees, filter reports, group the org chart, and optionally restrict where employees are allowed to clock in from.
Go to /panel/workplaces to manage them.
Where workplaces are used
- Employee profiles — Each employee has a default workplace, and additional ones can be linked from the Workplaces tab on their profile. See Employees.
- Kiosk devices — A kiosk device can be assigned a workplace so every clock-in from that terminal is associated with that location. See Kiosk Devices.
- Reports — The Time Log Report can be filtered by workplace.
- Org chart — The employee org chart can be grouped by workplace.
- GPS restrictions — Combined with permitted zones and the Time Recording Policy, workplaces can require employees to be at a specific physical location to clock in from the mobile app.
Creating a workplace
Open the Workplaces list
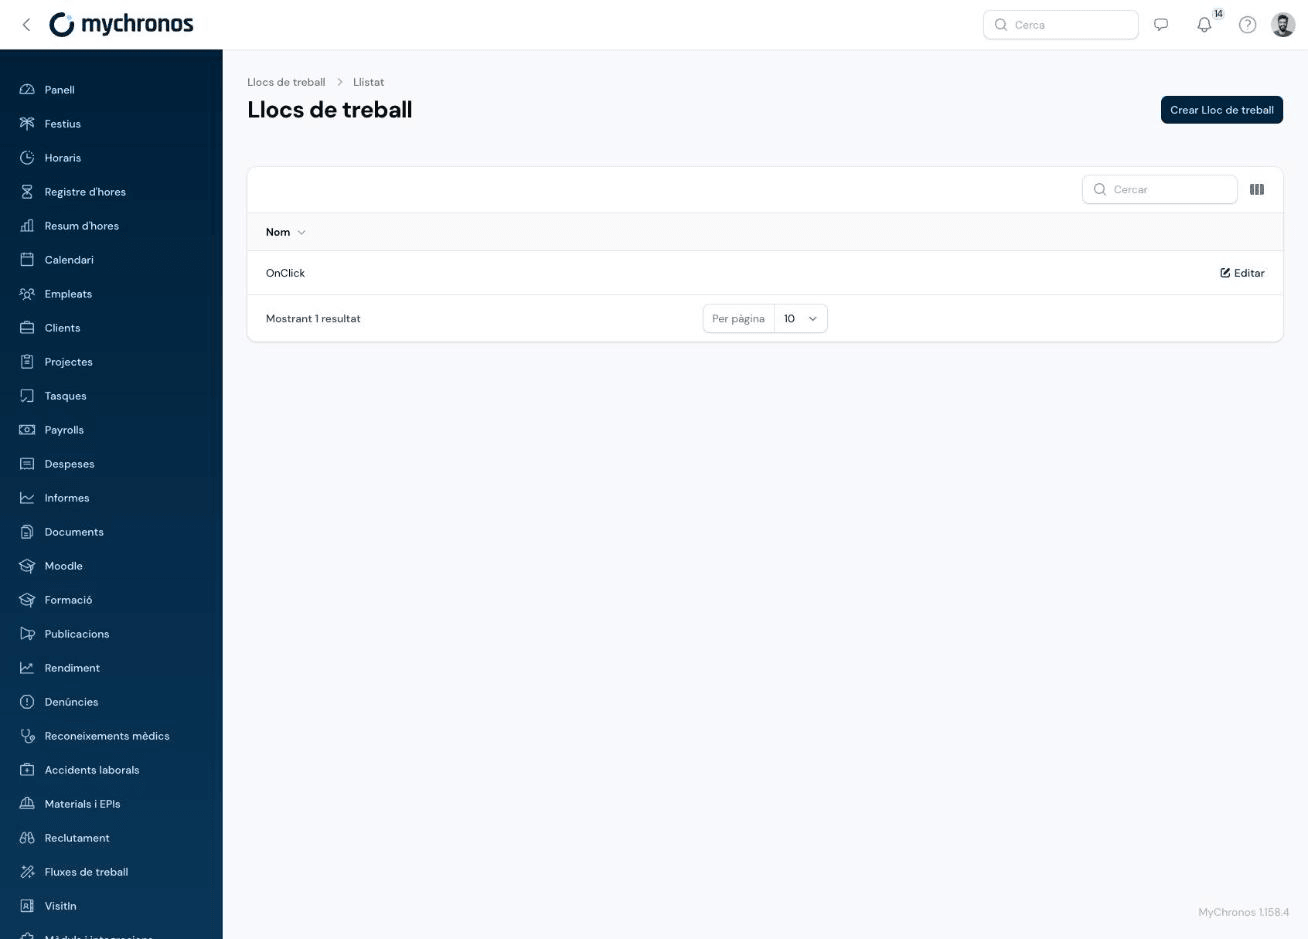
Go to /panel/workplaces and click Create Workplace.
Name it
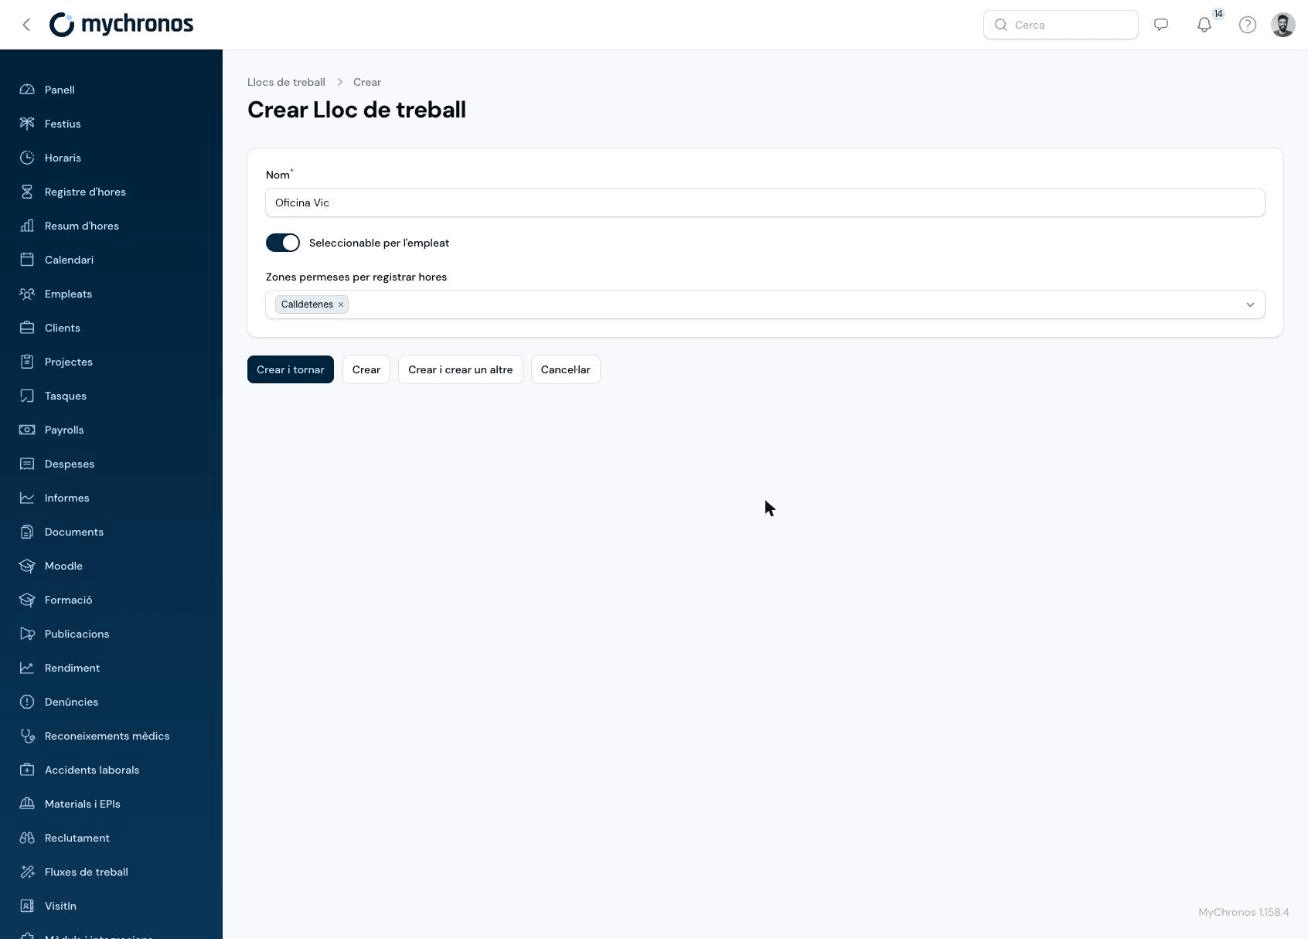
Enter a name for the workplace — for example, an office location or job site.
Make it selectable by employees (optional)
Enable Selectable by employee so this workplace appears as an option employees can choose themselves when clocking in from the mobile app. If disabled, the workplace can only be assigned to an employee from their profile.
Restrict to permitted zones (optional)
Select one or more GPS zones under Permitted zones for clocking. When zones are assigned and the matching option is enabled in the employee's Time Recording Policy, the mobile app only allows clocking in or out while the employee's GPS position is inside one of the selected zones.
Defining permitted GPS zones
Permitted zones are managed separately from workplaces, since the same zone can be reused across several workplaces.
Go to /admin/timesheet-limit-zones and click Create Zone.
Name the zone
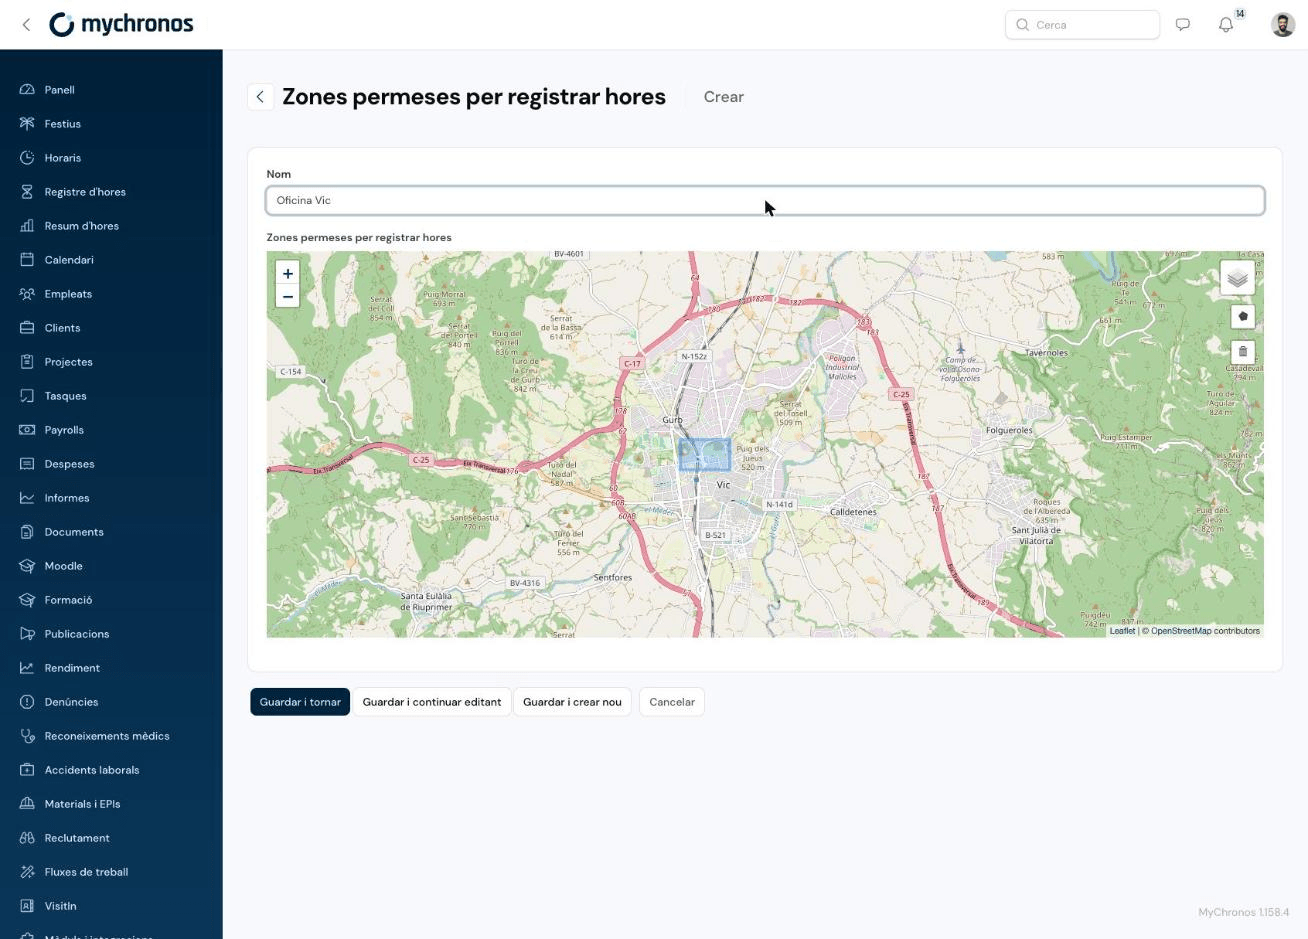
Enter a descriptive name — for example, the office or job site it covers.
Draw the zone on the map
Use the polygon tool in the top-right corner of the map to draw the boundary of the permitted area: click to place each point, then click the first point again to close the shape.
Save
Click Save. The zone becomes available to select from any workplace's Permitted zones for clocking field.
Zones only apply with the matching policy setting
Assigning a zone to a workplace has no effect unless the employee's Time Recording Policy has Require being inside permitted zones to clock enabled. See Time Recording Policy.
Assigning workplaces to employees
Every employee profile has a default Workplace field. To link additional workplaces to the same employee, use the Workplaces tab at the bottom of their profile. See Employees for the full employee form reference.
Deleting a workplace
Open the workplace from the list and click Delete on the edit page.